Monday, January 31, 2022

You gotta be warped to weave

 It's been ages since did a blog post, but this seemed to be the most logical spot to share how I put a long, wide warp on my loom by myself.  I didn't want to blow up everyone's phone with a ton of photos, and also wanted for them to be able to find it later when needed.  There are lots of different methods of warping a loom, and are usually contingent upon the type of loom, the fiber content of the warp, the weave structure, the length and width, etc.  I'm going to be documenting my baby blanket project that's going on my Louet David loom.  So here goes!

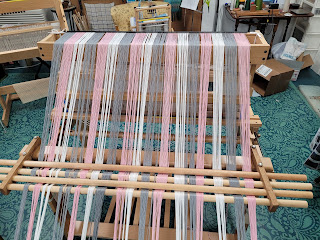
First, it's really important to wind a nice warp.  Since I'm going to be filling the entire width of my loom, I broke it up into five sections.  This makes it a little easier to keep good tension on the warp without tangling.  I like to warp by myself because I like to be in control of the tension.  Another weaver can be a good helper, but husbands and friends usually aren't able to mind the tension as well as watching and feeling for tangles.

As I wind each section, I put it onto the lease sticks which are hanging off the back of the loom.  This is a good chance to check to be sure any color sequences are correct.  Getting a middle bout loaded in the wrong direction is a pain in the neck to fix!  Keeping your cross is one of the most important elements.  I use metal book rings to secure the sticks together and hang them.

Once all the warp chains are loaded onto the lease sticks, I insert a bar into the end of the chains and velcro it to my warp bar.  This allows you to be able to slide the threads into position without having to deal with the cords that connect the warp bar to the beam.  Then I use long shoestrings to tie the lease sticks into position and hold them still.

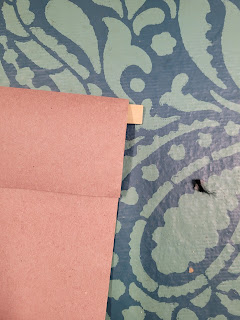
Next, it's time to load the raddle.  My Louet looms all have a built in raddle on top that is approximately 5 sections to the inch.  Since it's metric, I just have to leave a space every 4 inches or so to keep the width as planned in inches.  Since I'm right handed, I pull threads off the cross for the raddle from right to left.  I untie one warp section at a time and let it hang off the front of the loom to give it a little tension, which makes it easier to see the threads in the cross.  I have stick-on ruler tape on my loom next to the raddle so that I can see where I am.  It also makes it easy to find your starting point when loading the raddle.

Once the entire warp is spread in the raddle, put a little tension on it to even out the threads.  When it's nice and neat, lash the bar holding the warp to the warp bar.  I use 16/2 linen, but any strong thread will work, and I lash every inch.  The second photo shows the warp spread in the raddle and the warp bar secured.  Notice that the cords holding the lease sticks are tied as far out as possible to keep from being in the way as you wind on.


Next, it's time to get ready to wind.  Since this is a wide warp, I'm going to put in a layer of stick spacers when I begin to wind on.  This keeps my threads from being deflected by bumps on the warp beam.  


I also use Angel Wings to help keep the warp chains in position with some tension.  They aren't totally necessary, but are very handy.  My son made these for me, but you can buy them online.  


To keep tension on the warp while I'm winding, I stretch the chains across the room and put a weight on them.  If you have a carpeted room, books work fine for this.  Since I have a hard floor that doesn't get mopped often, I sandwich the chains between cardboard and place weights on top.  Be creative!

This is a good time to add a couple of c-clamps onto the back beam to keep your warp from spreading out farther than you want.


Once you get the first turn wound on and the beam is evenly covered with sticks, it's time to add separator paper.  I usually work with sections that aren't more than a couple of yards long.  Turn one end down about 3-4" and make sure that the side edges match, then insert a stick into the fold.  This will give you a straight fold which is easier to line up when inserting the paper.  And it gives you a firm edge which is easier to keep straight.


As you start winding on, keep an eye on the raddle and the cross to be sure you don't get any tangles.  Wind until the weights start getting close to the front of the loom.  At that point, stop, unwind more warp, and move the weights back as far as you can.  Continue in this manner, adding separator paper as needed and watching for tangles.  


Once I'm within a couple yards of the loom, I change to the "crank and yank" method of tensioning.  Turn the back beam one full turn (crank), stop, put some strong tension on each hank individually (yank), then repeat.  You can wind on an entire warp like this.  It just takes a little longer.  But the tension will be fine.  You can leave the Angle Wings for another yard, or just take them out now.

Continue winding until the ends are near the top of the loom but still in the raddle.  Stop winding.  Cut the ends to even the bouts.


Next, make a slip knot in each section to keep the treads from slipping off the lease sticks.  Once those are secure, move the lease sticks down to a height that you can see easily when threading.  I screwed a little eye hook into the castle to hold the sticks at a height that I like.


Now you're ready to thread.  Be sure to count heddles on each shaft before starting.  Especially if you have a loom that won't let you add heddles on the fly!